
Scanning film negatives on the cheap (posted 2022-07-03)
If you shoot (or shot) photos on film, you'll probably want to scan that film in some way to get those photos on your computer. There are various ways to get that done. For reasons that I'll talk about later, I decided to have a go at scanning negatives using my digital camera recently.
For that, you need the following:
A digital camera
A DSLR or mirrorless interchangeable lens camera should work well. You'll probably want at least a 16 megapixel sensor. I used my Nikon D7100 (24 megapixels, 1.5 x crop factor) and Nikon Z fc (20.6 megapixels, 1.5 x crop factor).
A macro lens or other lens that has close focus
I mainly used my Nikon 105 mm manual focus macro lens. That lens has a "reproduction ratio" of 1:2. The reproduction ratio is the ratio of the size of the subject and its size on the camera's sensor. At 1:1 a 36x24 mm negative fills a 36x24 mm "full frame" sensor.
Turns out the cheap Nikon 18-55 VR II kit lens gets surprisingly close to that macro lens with a 1:2.8 reproduction ratio. So that one worked pretty well, too. So check how close your existing lenses will focus.
A reproduction stand or tripod to keep the camera in place
I used my trusty but cheap tripod.
Something to hold your film in place
This is the part where improvising something home made is less than ideal. You'll want the film to stay securely in place, be flat and have as little risk as possible of scratching the film or leaving finger prints on it.

So I ordered the Valoi 35 mm film holder. Valoi has an extensive modular system for holding film for scanning. But just the 35 mm holder for € 39 (plus € 10 shipping) will do the trick. You can always get the advancer and other accessories later to help you scan more efficiently.
A light source
There are various light table / tracing pad solutions out there. I used my iPad Mini instead. Just set the screen brightness to maximum and the auto-lock to at least 5 minutes. Then load about:blank in Safari to get a nice bright white page.
Resolutions
I have it on good authority that 4K Is the current sweet spot. That's about 12 megapixels. We can accomplish this with a 12 megapixel sensor and a 1:1 reproduction ratio macro lens. Or with a 20 megapixel crop sensor and an 1:2 reproduction ratio lens.
The sensor of my Z fc has a resolution of 5568x3712. Divide by 2 = 2784x1856. But the crop ratio works in our favor here, so now multiply by 1.5 and we get 4176x2784. So a bit over our 4K target.
With the 18-55 mm lens on the D7100 that's going to be 6000x4000 / 2.8 = 2142x1428 * 1.5 = 3213x2142. So that's a bit under 7 megapixels, not quite our target, but a decent start. Compare to many flatbad scanners that can scan negatives at a maximum of 2400 DPI = 3400x2268.
Software
No software!
At least not for black-and-white negatives and color slides. As a teenager, I often shot on slide film and just had the film developed and not even have the slides framed. That was the cheapest way to shoot photos and get to see the results. I still have some of those strips, and because the colors are natural, you just take a photo and everything looks like it should.
With black-and-white negatives, the image needs to be flipped. You can of course do that with lots of different software, but with Nikon cameras there's an easier way to do this: with picture control. I've created three picture controls with Nikon's Picture Control Utility that will make your camera shoot photos as black-and-white negatives.
Which of course turns negatives back into positives. This means you can use the JPEG straight out of the camera rather than having to edit raw files. But you can of course still edit the raw files if you like. For me, that's something I'd rather skip if possible. With Nikon's software (including the free NX Studio), the picture control settings will also (by default) apply to raw files, but other raw converters won't "see" the picture control settings.
Annoyingly, this approach doesn't work for color negatives, as picture control does allow us to invert the brightness curve, but that doesn't have any effect on the colors. So dark blue becomes light blue while on a real negative dark blue would be light yellow.
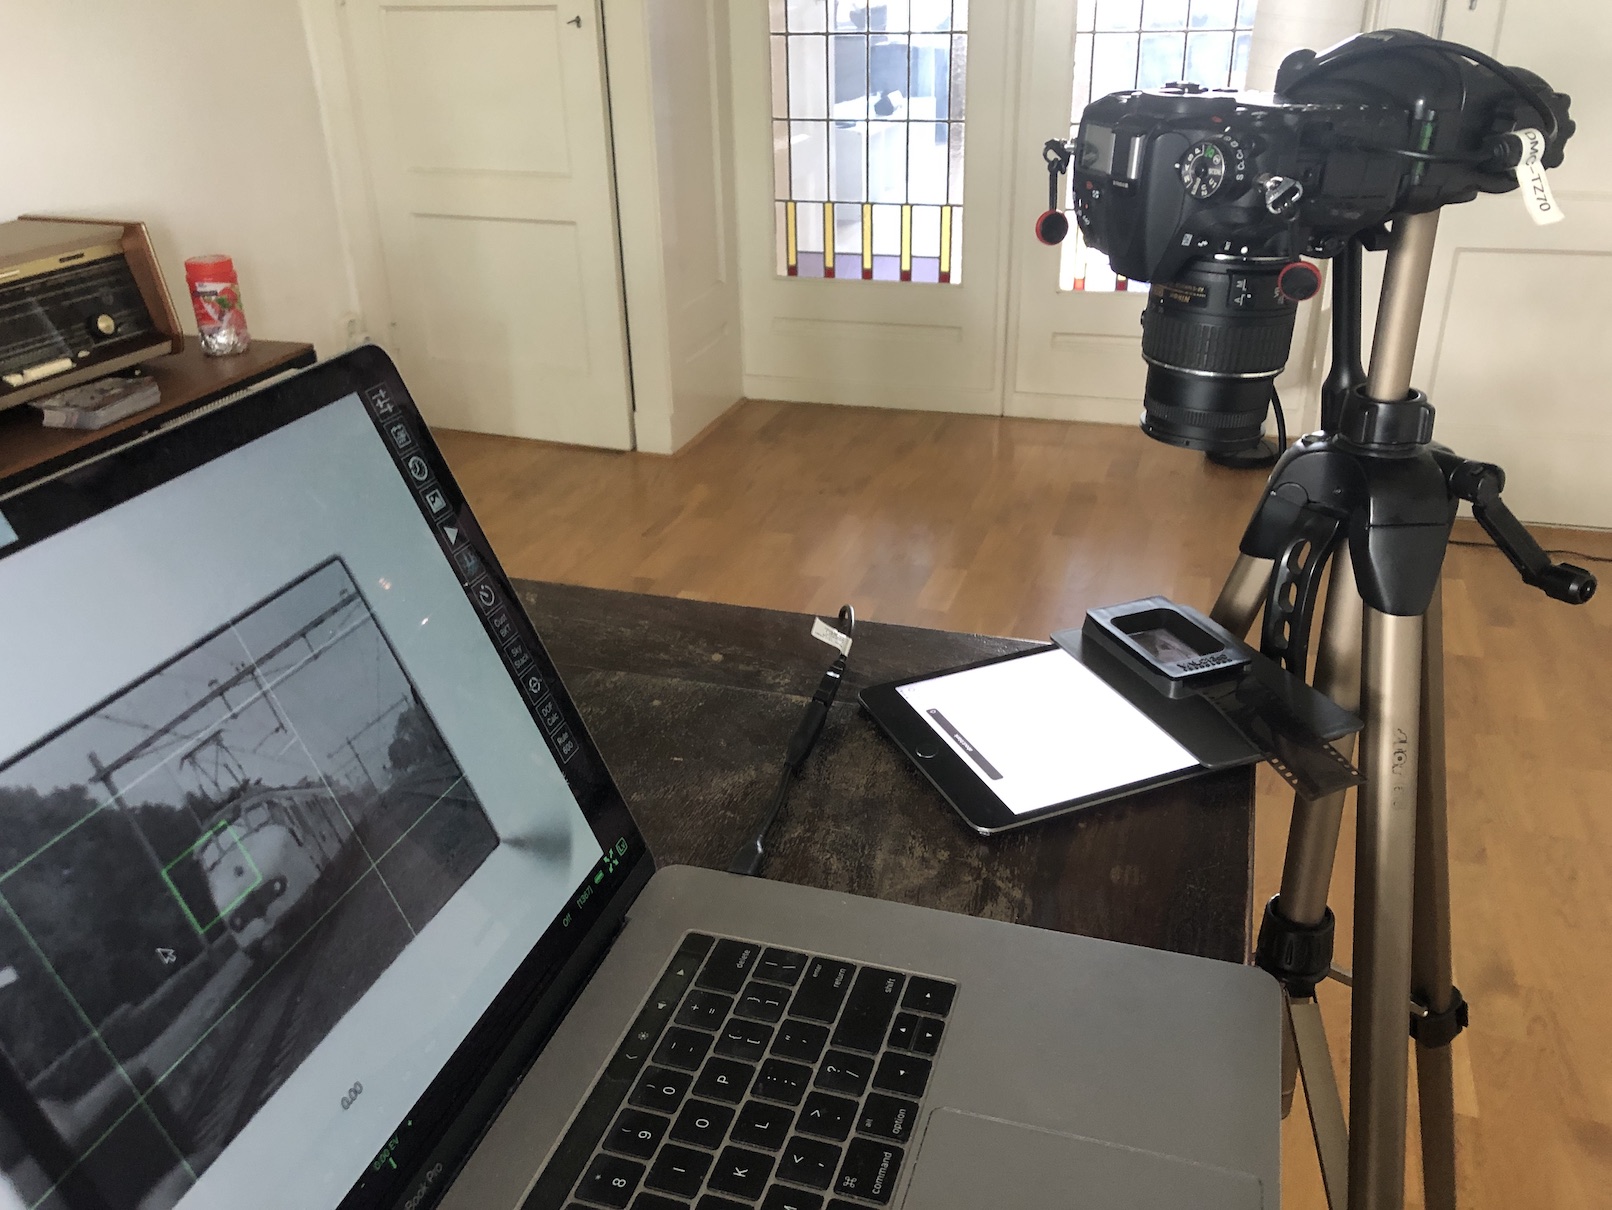
Ok, "no software" wasn't completely correct: I do like to use qDslrDashboard. This lets you use live view and control many camera settings and actions from your computer hooked up to the camera with a USB cable. There is other software that will do the same thing, including Lightroom.
There are several software packages that will help you convert negatives into positives, such as the NegativeLabPro plugin for Lightroom. But I prefer to see how far I can get without paying for software first.
Installing picture controls
Download a ZIP file with the three picture control profiles here. You can move them to your camera by making a NIKON directory on an SD card (if it doesn't exist yet) and make a CUSTOMPC directory inside the NIKON directory. Put the three .NCP files from the ZIP file inside that CUSTOMPC directory.
Put the SD card in your camera, and go into the "photo shooting menu" and navigate to "Manage Picture Control". There, select "Load/Save" and then "Copy to camera". Then you get to select one of the profiles on the SD card. Import all three one at a time and store them in a free picture control "slot".
The C0 one has normal contrast, C1 a bit higher contrast and C2 even more contrast. When this is done, you can use the "Set Picture Control" menu item to select the one you want to use.
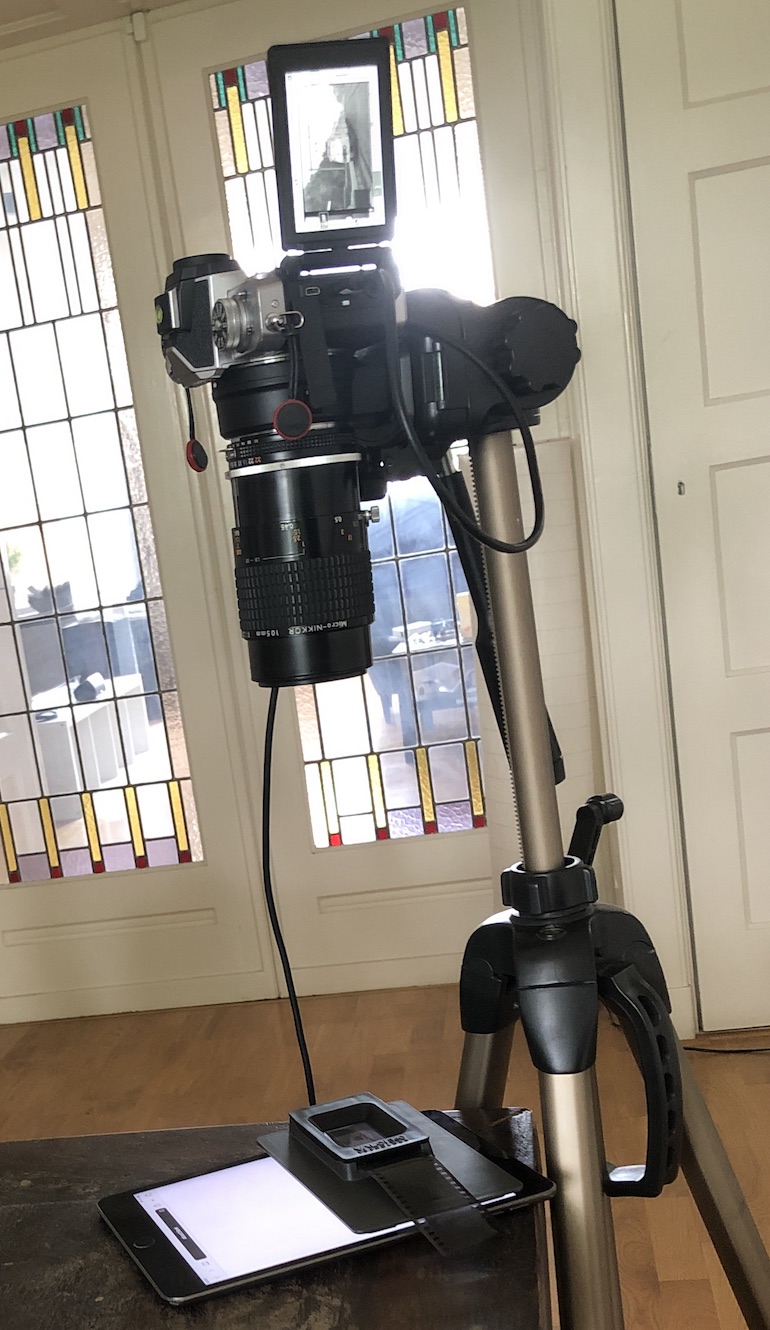
Setup
I put the tripod with the camera on it at the corner of a table and point he camera straight down to the table. It's important that the camera is level relative to the film. This is easy to accomplish by laying a mirror (with a flat back) on the table and then adjust the camera until it sees the center of the lens in the center of the image.
Set the iPad to bright and let it show a white page, as mentioned above. Then put the film holder on top of the iPad. It's best to use gloves to handle the film. Valoi recommends putting the film in with the emulsion side (the duller side) to the bottom. My film was all in strips, but working with uncut rolls of developed film should be easier.
I used the following camera settings:
- On the mirrorless camera: 3 second exposure delay and "silent photography" (i.e., electronic shutter only)
- On the DSLR: mirror up exposure mode
- For negatives: negative B&W picture control
- ISO: 100 (lowest normal setting)
- Aperture: f/5.6. This was sharper than f/2.8 or f/4. F/8 might be even sharper, but at that setting the iPad screen pixels started to show a bit
- Manual exposure
- Shutter speed based on (live) histogram and/or test shots
It's best to make the room you're working in as dark as reasonably possible to avoid reflections and glare on the scans. This should include covering part of the light source not covered by the film holder.
Focusing
With the manual focus macro lens I obviously had to focus manually. With the 18-55 mm lens, you can focus a bit closer in manual focus than in autofocus. And if the reproduction ratio of your lens is a limitation, you'll want to focus as close as possible manually and then move the camera to get the film in focus. With autofocus you'd have to back off a bit to give the focus system something to work with.
However, if you have an autofocus lens and reproduction ratio is not an issue, you can just use qDslrDashboard to click somewhere to set your focus point and then click "AF" to focus. That is mighty convenient.
For manual focus, I used the little crank to extend or retract the tripod's center column. With the Z fc, I could zoom in on the live view image and focus very precisely looking at qDslrDashboard on the computer screen. With the relatively ancient D7100 I had to disconnect the computer in order to use zoom in live view or focus through the viewfinder. Which is not helped by lack of an articulating screen...
The shot
At this point, it's a good idea to check whether the horizon and/or buildings are level. This is easy to do by selecting the center focus point and use live view zoom and see if lines are not crooked. If not, I adjust the position of the film holder and/or iPad until they are straight up/down or left/right. That saves an adjustment in software, which always eats up some sharpness.
Now let all movement settle, and take the shot. qDslrDashboard can immediately import those to the computer, so you can open them and check if everything is the way it should be. Perhaps adjust exposure, change to a different picture control setting to increase/reduce contrast, or try again if there was movement.
Also check for dust and hairs. A little air blower (not canned air!) is your friend. In stubborn cases I've wiped down the film with a clean microfiber cloth, but not sure if that is recommended.
Advance the film through the holder, and do everything all over again.
Results
Back in 2014 I scanned all my negatives using an Epson V370 scanner. I'll have more to say about the pros and cons of that approach vs camera scanning, but first let's compare some results.
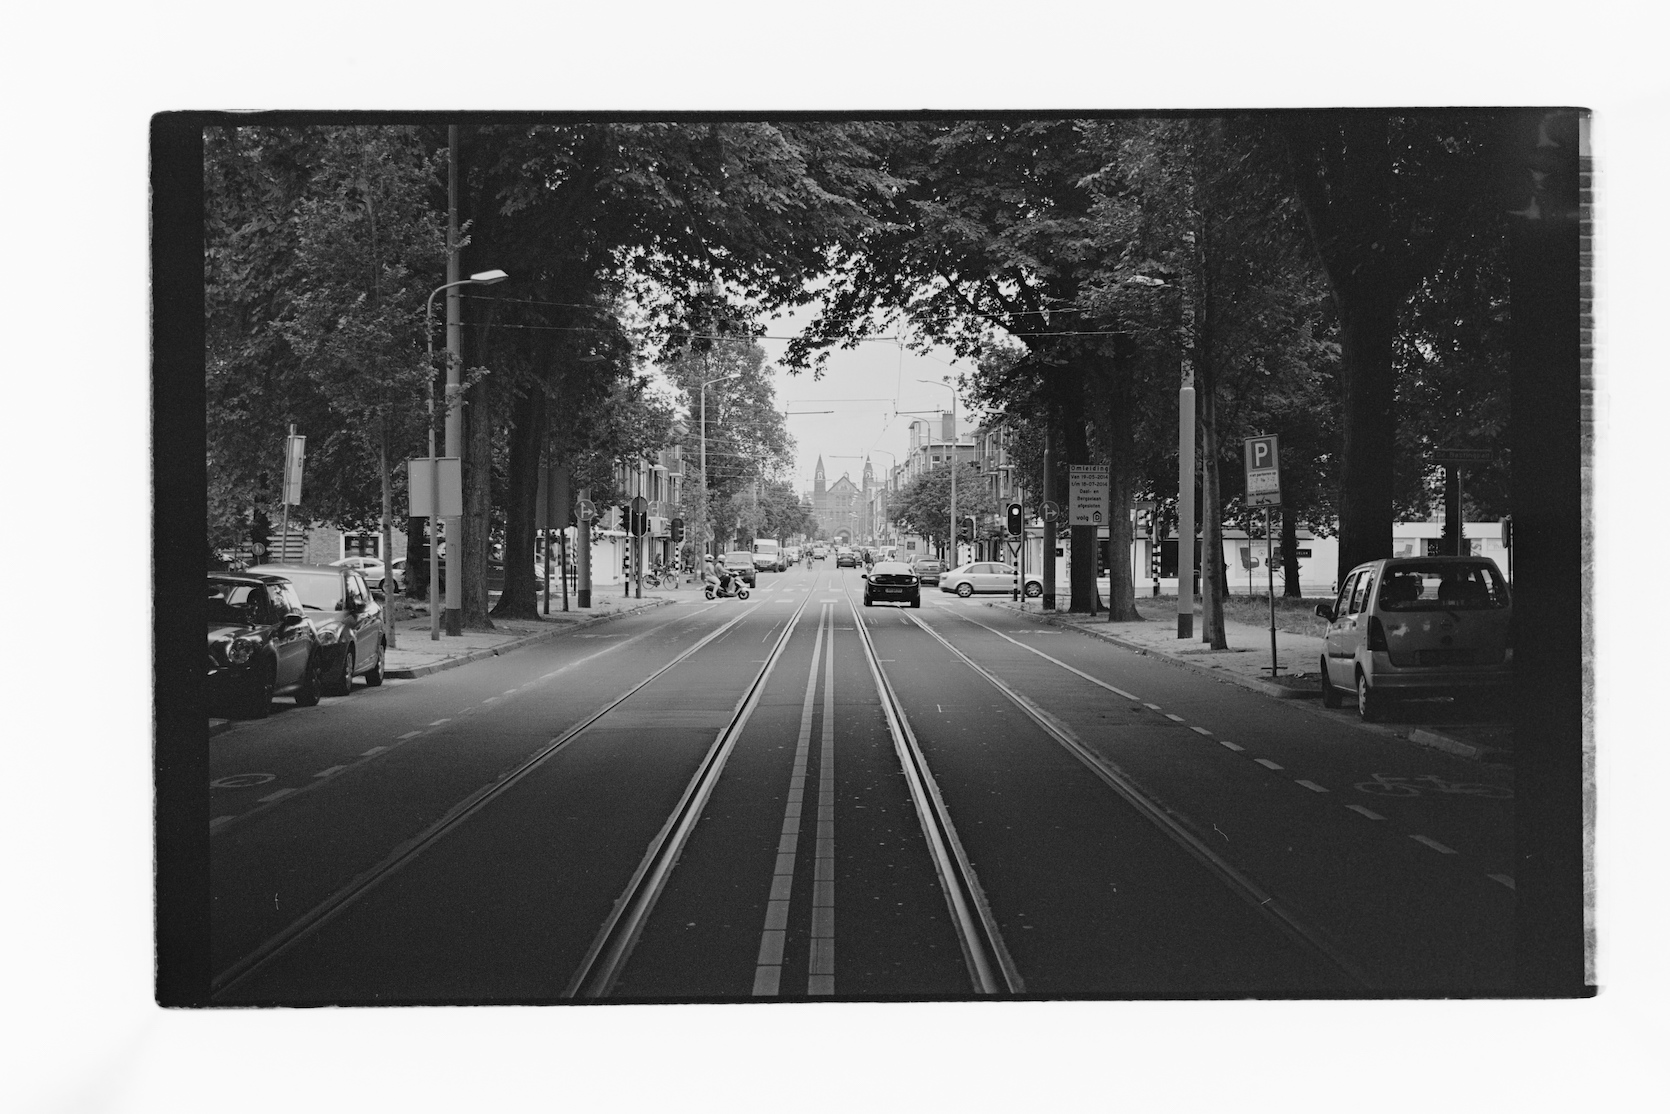
This is the Epson scan of a photo I really like that I shot on Ilford XP2 Super (lower resolution):
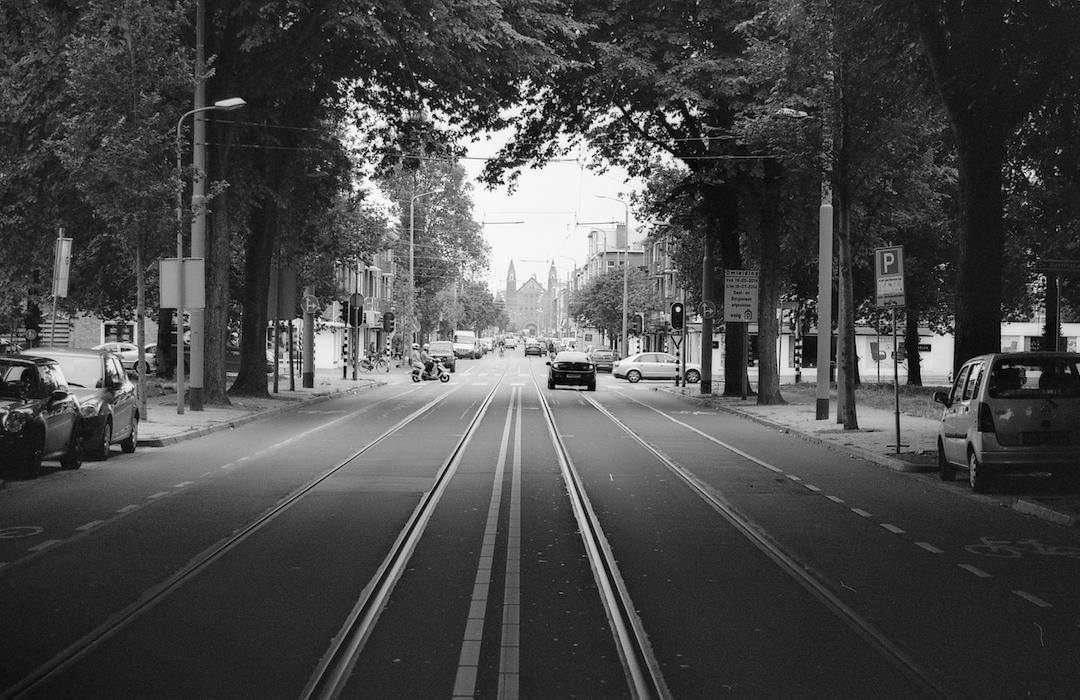
This is the same negative shot with the Z fc (resolution reduced a bit):
This is a zoom of part of the Epson-scanned image:
Same zoom for the camera scanned image:
The camera scan is definitely sharper, and has fewer artifacts around high contrast areas. It also shows more of the image, the Epson software is definitely not shy about cropping the image a bit.
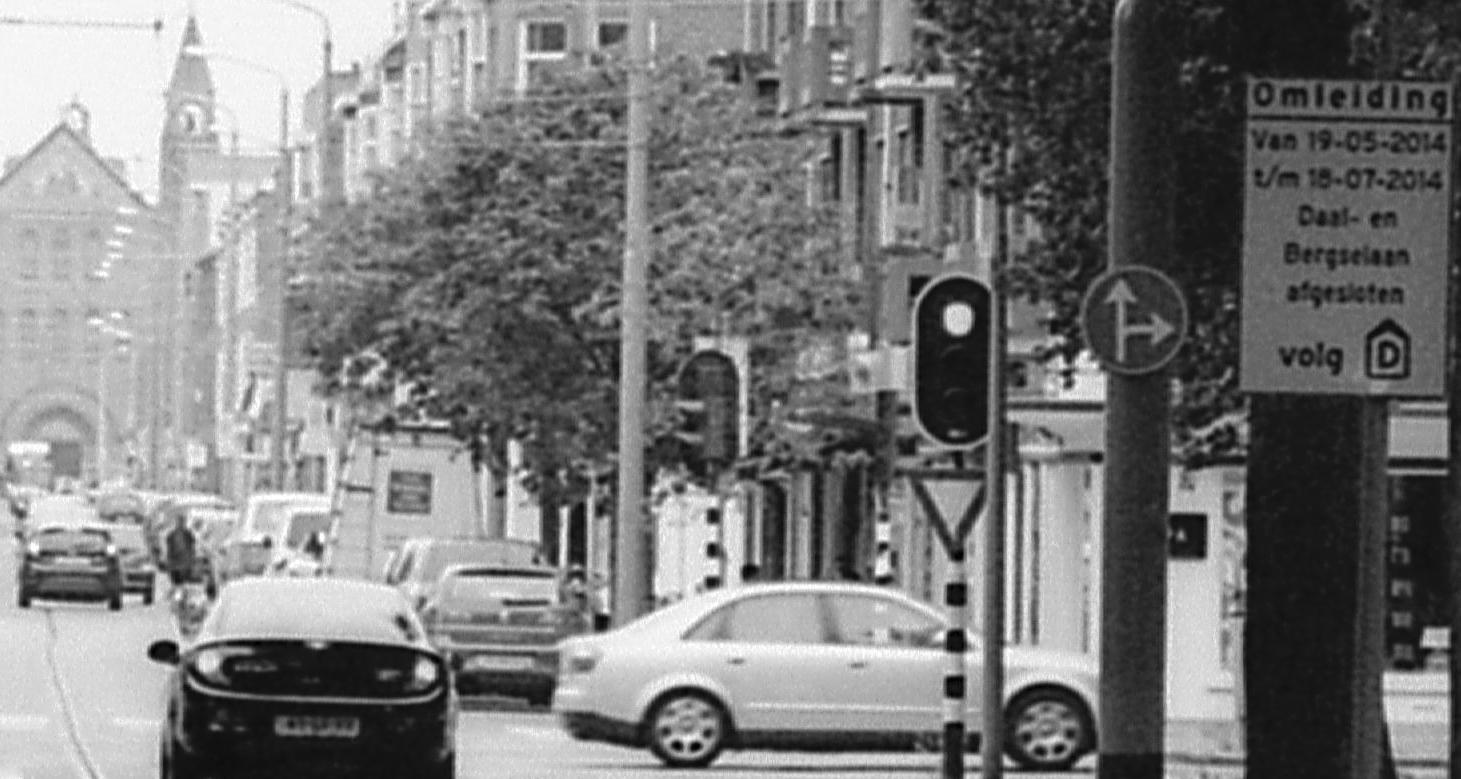
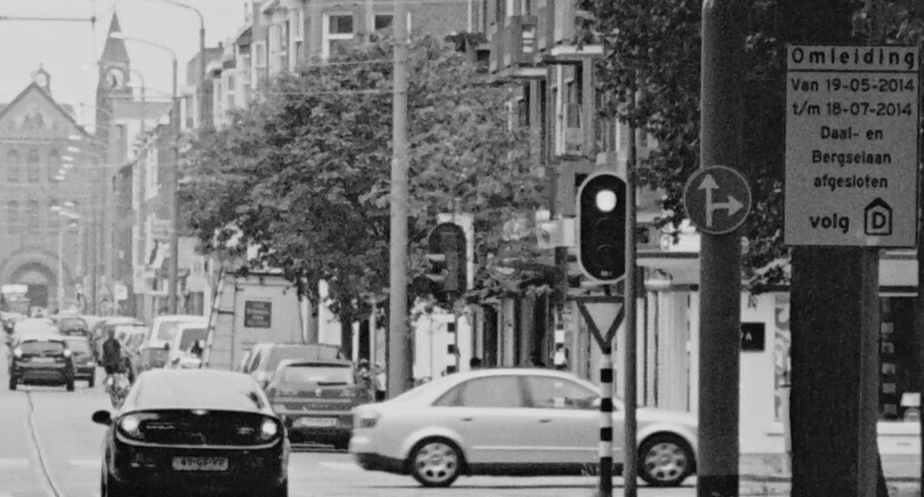
The difference is even more pronounced on this photo shot on Ilford HP5+ in 2014. Epson full shot:
Epson zoom:

Camera scan zoom:
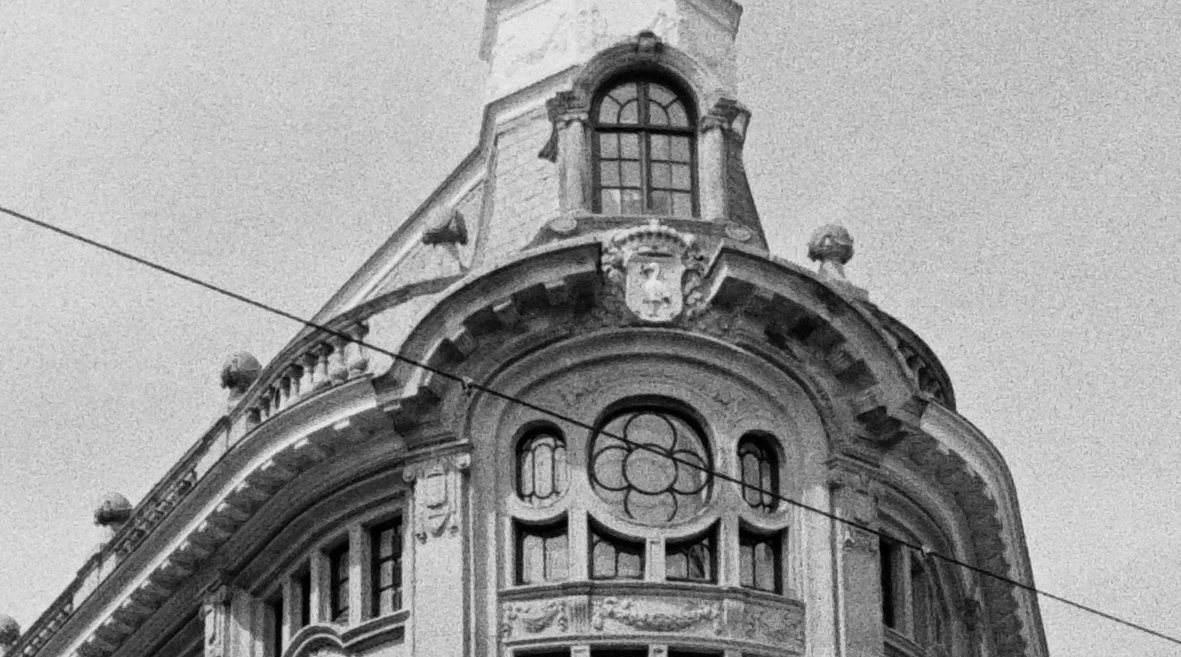
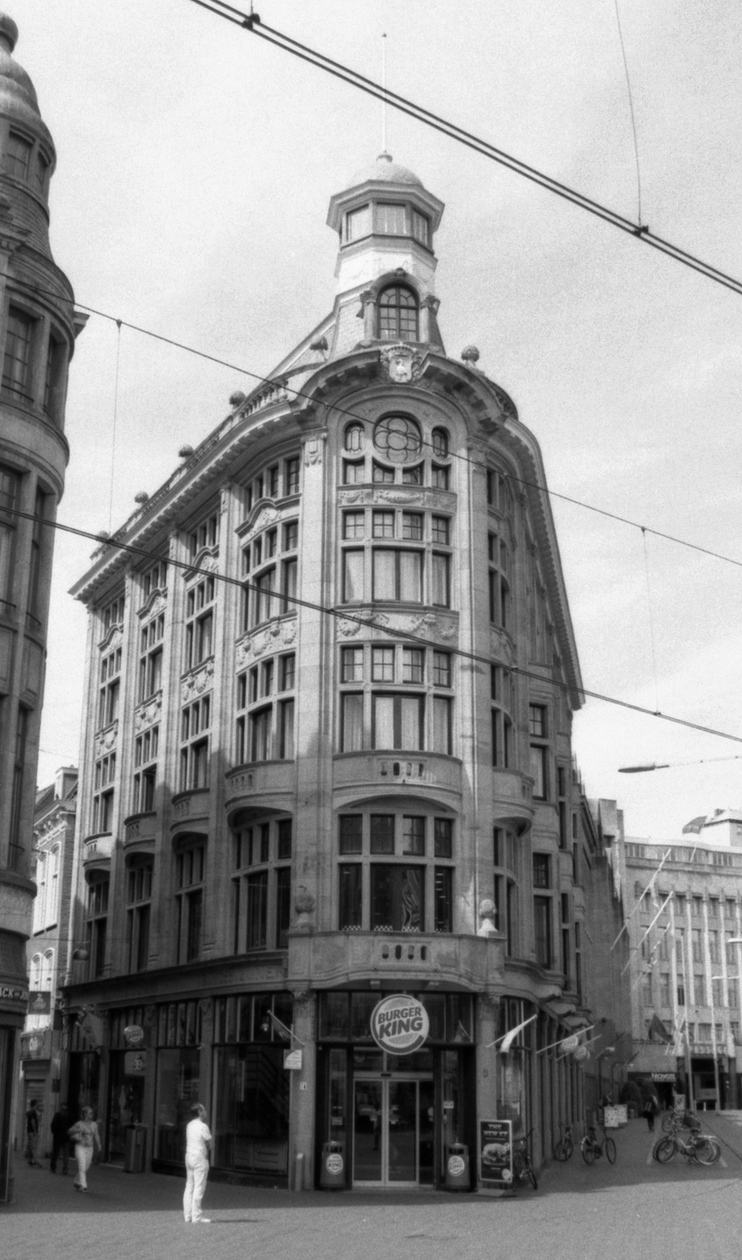
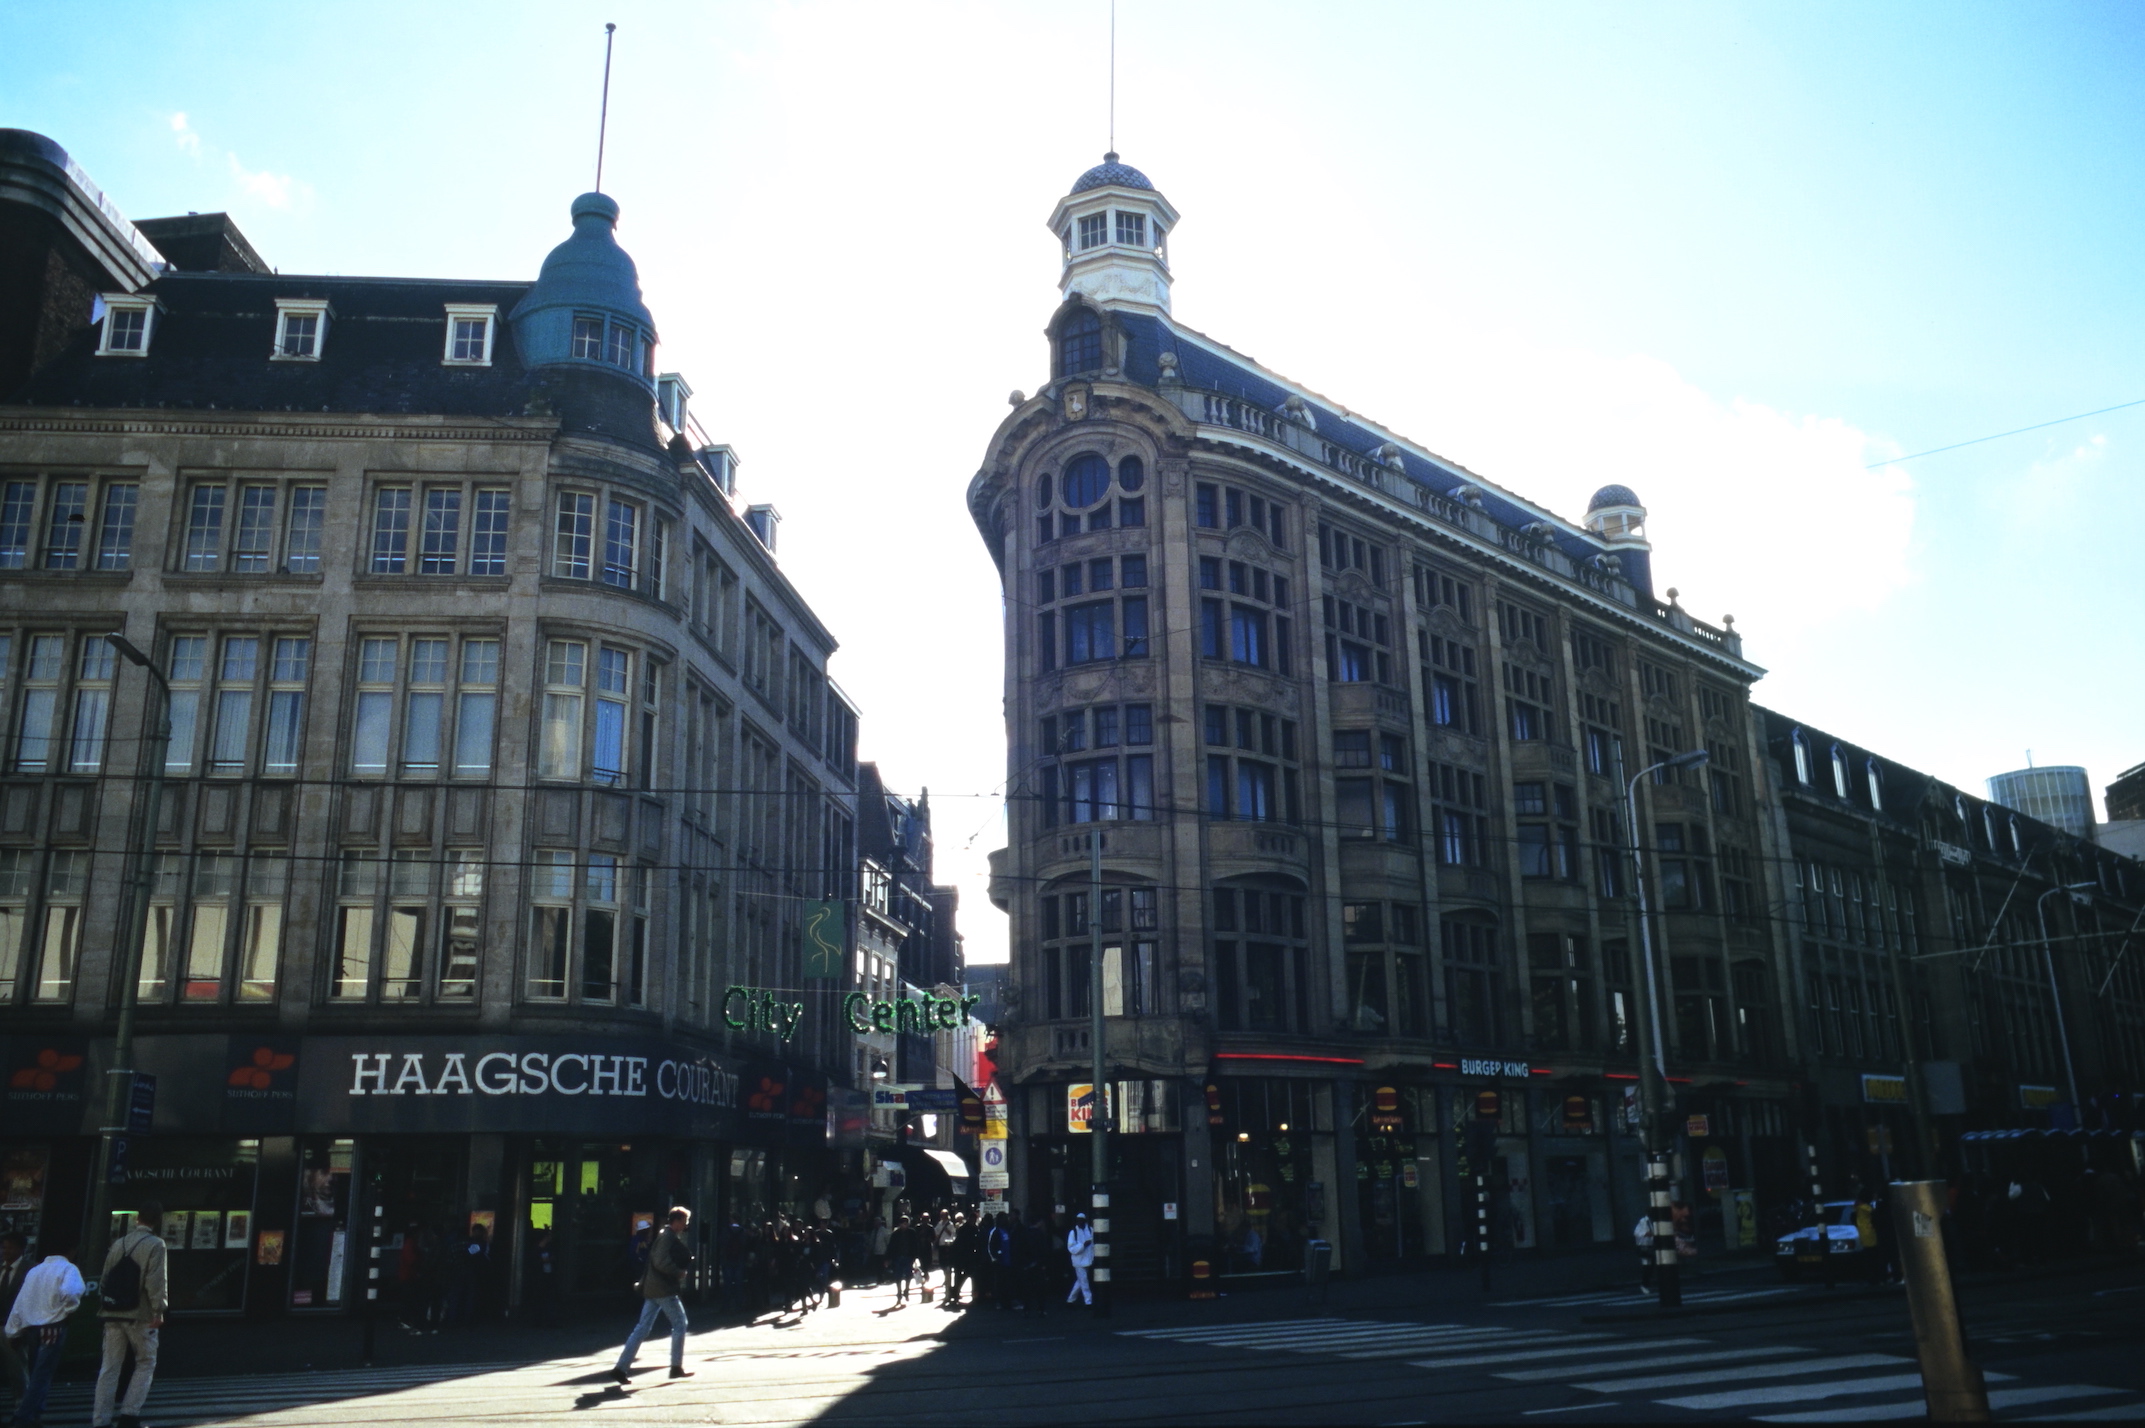
And for good measure, here's the same building shot on slide film 25 years earlier:
Flatbed scanner vs camera scanning
Back in 2014 when I scanned all those old negatives, that took forever: I had to put one strip of film in the scanner at a time, and then the scanner would take about ten minutes to scan it. Then, it turned out there was obvious dust or a hair on the scan, and I had to blow air over it and try again. The software gave me relatively decent results automatically.
So the process was mostly just watching TV and get up to change film strips or blow air every 10 minutes.
However, I loaned that scanner to a family member and I'm not sure if it's coming back anytime soon... so I started to think about something different for some film I shot recently.
With camera scanning, once everything's set up, the process can actually be a lot faster. But if you include time for either adjusting settings and trying again, or the time needed afterwards for post processing, the process still takes a good amount of time, and there's no TV watching between scans.
So if you just want to bulk scan all your negatives and you can live with the results not being perfect, a negative-capable flatbed scanner is a decent choice. I'd go for one with ICE for dust removal (on color and chromogenic negatives), though.
But if you want high quality results at home, especially if you're not bulk scanning, camera scanning can be a very good option.